Sunday, March 7, 2010

making shop samples!


This cute apron is from the book Retro Aprons by Cindy Taylor Oates.
This is apron # C. I used the applique motif from apron A. I customized it by adding a couple leaves and an extra center to the flower. The apron pattern is very easy to make. The instructions are pretty clear. There was only one part that could have had one more diagram and that was putting the straps in side the yolk. Otherwise I highly recommend this book! (Ps this is not my body, wish it was!)
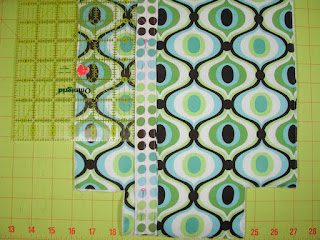
I found these fabrics going through my stash... wouldn't that apron be cute in these????
Boy hope I have enough. Will let you know.

Thursday, February 25, 2010

LUNCH BAG TUTORIAL

I feel in love with this pattern at Joann's website under projects here!
 
I make a pattern out of "True Grid"
it is great for pattern making light and you can see through it. I plan to make more so this way I don't have to measure my pieces every time.
  
baste insul bright to wrong side of main fabric.then cut away the 2 1/2 " corners  
Making the straps and ties see below. (steps 1-9)  (1) Iron strap wrong sides together. (2-5) Fold one side to the center place strap webbing then fold the other side towards it. Fold again continuing to iron between each step. Pin and stitch 1/8 each side. (be careful of pins. I always get stabbed on this step!!!!! (6) I like to use the lip of my sewing foot. Then sew down the middle of your strap to make a nice finish. 
Repeat this process with out the webbing for ties (9)

measure 3" inches in on right side edge and left side edge of fabric to place handle. Becareful not to twist.
 
Sew strap on to each front. Matching the 1/8 ' stitches except the center. Sew up to insilbright then turn and go down other side of strap. Repeat other bag front. 
  
Measure one inch down from insil bright, (I fold my fabric back temporally to see where it is)
mark in the center between where the strap are. This is for the button. I use a large wood button; I like the natural look for the lunch bag.  NEXT on the other piece of bag ...
 
mark 2' from the TOP of bag (raw edge) this is where the tie will go. (see instructions above on ties and handles)
  
sew tie, parallel to raw edge (for some reason I got confused here so hope this pic helps)

sew bag pieces together (1/2 ' seems) and lining pieces together leaving a hole on the side towards the bottom of lining for turning.
press seams open.
stitch corners 1/2' seams becareful on the bag front there are LOTS of layers! Stitch slowly going over all the layers!


bag should look something like this, front is inside out. Now turn right side out.
Keep lining inside out.

Place (turned Right side out  bag inside lining. Match seams pin very well stitch around top 1/2 '.
Turn out through lining hole.


 Slip lining inside the bag and make sure that the top edge is lined up. Press REALLY WELL . DO NOT SKIP THIS STEP.


top stitch around about 1/8' I like to use the lip of my sewing foot.
Congrats you are done! YEEEPEE! 
now make an awesome lunch. It will keep hot or cold!


Thursday, February 4, 2010

Lunch bag made by others

'
Thank you so much Sandy for making this beautiful bag, you have been an amazing encouragement to me these few weeks. I just love you : )
Check out Lattegirl40 blog HERE

Thanks to Sewspoiled for checking out my blog and making this cute bag!
I love the fabrics she choose. Wasn't it fun to make? 
Antother pretty bag by Nicole Ferguson.


Cute doll pins and felt dolls!

 
 I made these dolls at Christmas after seeing these at Posie gets Cozy
I flipped over them. I thought they were so cute. But I had to make a Korean one, since one of my best friends is Korean : ) She loved it! They are really fun to make and you can find the supplies at Jo-anns
fabrics or Micheals. You need to download the template for the dress and get the Doll pin heads, and stands. And Doll pins. Some skilled painting is required : D I used flesh colored acrylic in the little bottle to paint the heads first.
Also no machine sewing required, I used my pinking shears for the bottom of the dresses and just gathered the top by hand, as if making a yo-yo.

 
I made these using this book as my inspiration. I did not make them into finger puppets I cut a circle for the bottom, stitched around it to close in the stuffing. I then made a little bed with sewn slots for each doll. The bed rolls up and closes with a ribbon tie. My friend Jean's kids really liked them and now do little puppet shows. This was their Christmas gift.

Tuesday, January 26, 2010

Pillow in the fold

I love this pillow pattern by American Patchwork and Quilting. It was in the April 2006 magazine. The pattern is called "In The Fold" I tried to find it online but had a tough time... Let me know if you are interested by comenting on this post. I will try to get the pattern. It is really fun to make. Great for scraps!!!!
 

Monday, January 25, 2010

In love with Potholders!

I am in love with this book called 101 Fun to Quilt Pot Holders. There are so many cute patterns
and they are very fun to piece. They make great gifts and when you are looking for a small project, this is very satisfiying. Also a great way to use up some of your fabric scraps lying around. Below I show you my quick technique...


I use a flying geese ruler only because it is exactly 8.5 inches squared. This is the size of the potholders in the book and even if you are just using fabric with out piecing this is the size I like to cut. I use (2) 8.5 squares of regular warm and natural batting, and (1) heat safe (Insul-Bright)
8.5 inch square. I cut (1) 1.5 inch x 5 strip for the hanger and fold over 3 x s. Make sure to layer as folows:
front side and back side R sides together then the all the battings below the front and back fabrics.
Stitch all the way around with little hanger in place in the corner. Leave opening for turning.
And guess what? I used the blind stitch on my sewing machine to close the hole. It worked great. No hand sewing yippee!

Thursday, January 21, 2010

so much time so many unfinished...

One of the many unfinished quilt squares sitting in the closet. Sad abandoned squares. This was done with the freezer paper technique. I love to use a glue stick to turn my edges under. Hum...
maybe this should be a tutorial??? Pattern is in this book. Cheap!

Wednesday, January 20, 2010

Good ol' fashion sweetness

Mary Maxim project download.
Mary Maxim is a wonderful catalog old fashion crafting. I just love this catalog and when I get it in the mail it is such a treasure. You can find stamped cross stitch and stamped embroidery designs. Before my grandmother died she gave me the stamped pillow cases below. I have been making them the color of our guest bedroom. Yellow and red. The pillow case kit was done in purples. I changed the colors and like it better. The fabric is wonderful to stitch on. It is a cotton polyester blend. Very smooth for the DMC threads to go through. The blue lines will wash out. I can't wait t o see how my work will look once those lines disappear!
You can order a free catalog here.


Wool felt pattern from Belly Buttons

Wool Felt small pillow pattern HERE. It will appear on your desktop.
You can make this as a baby gift or a gift for a friend or enjoy as a sweet gift to yourself. Please comment on this link and then you can show me your work. I will put your finished pieces on my blog!

Tuesday, January 19, 2010

More Freebies can you stand it?

1. sewing caddy- people quilt HERE
2. pointy kitty pattern HERE
3. valentine wool heart HERE

she saw the wonderful pattern from Wee wonderful's "pointy cat" and had me make it. 
(By the way,you can leave more of an opening for stuffing from the neck and the back. The pattern tells you to leave a smaller opening which makes it too hard to turn out. The stripes on the cat's back, covers up your stitching.) The pointy cat is really cute and not to hard to make. It is a very cleaver pattern. Make sure to stuff the legs well however, the cat's head is big and causes it to topple over so it needs to be anchored well with having more weight on the legs. The big head is that is what makes it cute.This inspired the quilt and baby bib to go with it. Thanks Kim and WEE WONDERFULS!  

Kim chose these very sophisticated fabrics. After a long weekend, vola, the completed gifts!

What to do with left over quilt scraps????

With my machine embrodiery , I made a rose chosing colors to match my fabrics.
(The fabrics were left over from the quilt I was making.) When the embroidery design was finished, I cut out a center
square and added boarders to match the size of 2 other larger quilt blocks. In this case I made to large pinwheel blocks and sewed them on either side of the center block. I sewed brown polka dot strips between each block. It added more length to my runner with out added more work. Next, I quilted my piece to make a nice table runner.

Get FREE machine embroidery download HERE!!!!!!! it is number 9

Quik Tips... NOT ENOUGH BATTING????? How to fix it!!!!!!!

It's raining and it seems you don't have enough batting to finish your project. Urrrg you don't want to run out to the store. But here is a great way to piece your batting so that it is long enough... add scraps or your extra piece of batting with a machine zig zag stitch...
put pieces together under your machine. DO NOT layer on top of each other. Just simply put together or bud together snugly under your foot. Widen your zig zag stitch and start stitching your batting together. Viola! It will hold and you will never feel it after you quilt your piece!

Wednesday, January 13, 2010

people must like this photo. ..

People must like this photo. 41 people on flickr made it their favorite!
The pattern for the pillow on the chair comes from one of my favorite wool felt sites called
"All Through The Night" you can find the pattern here:
ALL THROUGH THE NIGHT